Acoustic Foam Installation Guide
Step 1.
Before starting, make sure you have a clean and convenient work area for applying adhesive to the back of your foam sections. Clean all surfaces to be treated with acoustic foam to ensure proper adhesion.
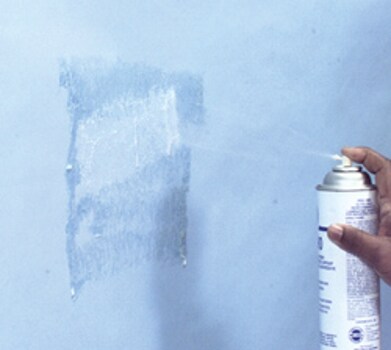
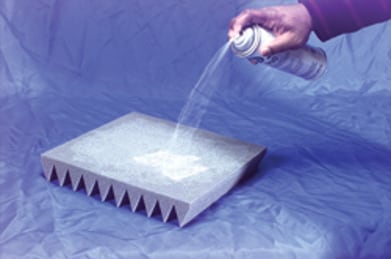
Step 2.
For best results, apply spray adhesive to both the foam backs and the surfaces to which you will be attaching the foam. Spray the adhesive approximately 10 inches from the surfaces and use a back and forth movement, creating a web-like pattern.
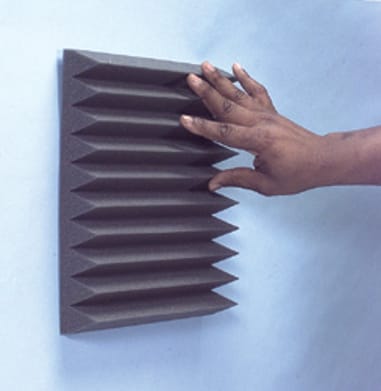
Step 3.
Once the entire area has been treated with adhesive, wait approximately one minute for the adhesive to become tacky before joining the foam to the other surface. This will ensure a very strong bond. For a more temporary bond, spray only the foam back and not the other surface. Most polyurethane and polyester open cell foams can be installed this way. Be sure to use an adhesive that is safe and appropriate for the foam that you're using.
Temporary Mounting
You may prefer to mount the foam less permanently, or in a fashion that will not damage the drywall if the panels need to be removed at some point. Using standard straight pins and a tack hammer, drive four or five straight pins into the drywall at a downward 45-degree angle. A quarter-inch into the drywall is sufficient depth for the pins to support the foam panel. With a pair of diagonal cutters, cut the heads off of the pins, and simply press the foam panels onto the pins. When removed, the pins holes can be pressed nearly closed and flat with your fingertip, and can be covered easily with latex wall paint if necessary. This method also works just as well on any type of wood paneling.